Spring will be here soon and we are so excited. There is just something about knowing that the warm weather is coming that lifts my spirits. Since, Spring will be here, I thought what better way to celebrate Spring than with a cute Spring dessert that the kids will love. This simple Spring treat will leave the kids giggling. A little marshmallow piggy, hiding in the green grass, is a great way for kids to get excited about the warm weather and all the things that they can do in the green grass. Plus, for you, it is easy to make, and you will win major fun points with the kids. You can set up the piggy in some Easter Grass, edible grass, even in green icing strands to look like grass. Or if you have someone who just loves pigs, or farm animals, you can add this little guy to the top of a cupcake or special occasion cake.
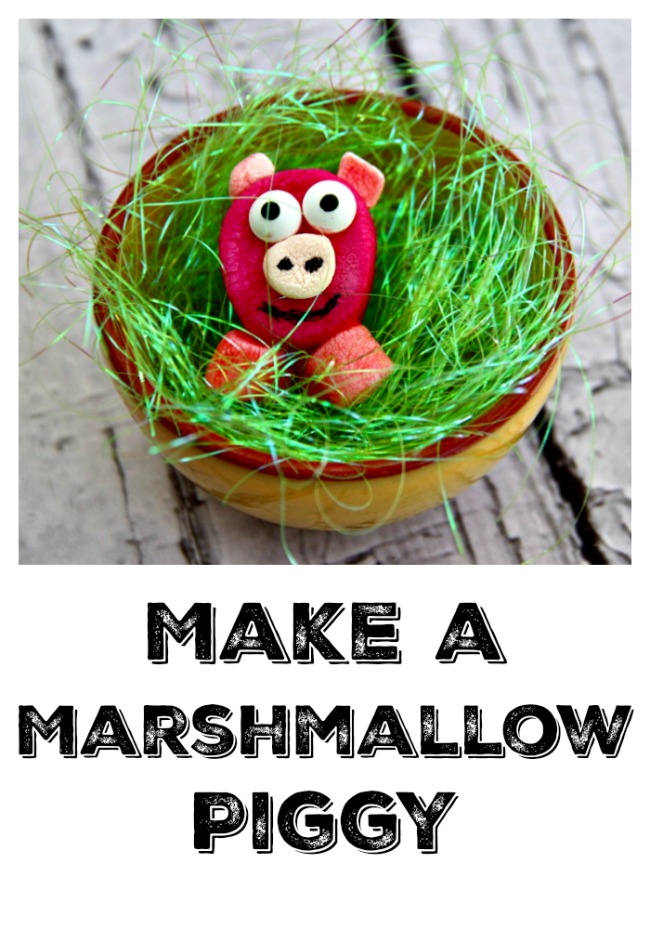
Marshmallow Piggy
Supplies:
- large marshmallows
- red jello – strawberry or cherry
- small pink fruit flavored marshmallows
- Wilton candy eyes
- Wilton Black Decorating Gel
Directions:
Fill small bowl with water and add gelatin power until desired color.
Dip the large marshmallow in the gelatin liquid dipping until it reaches the desired color.
While marshmallow is still wet with gelatin, set on parchment paper and attach pink mini fruit marshmallows for the ears, feet and nose.
Attach the candy eyes above the nose. Once the gelatin dries these will be stuck to the marshmallow. For additional security you can make a simple royal icing and attach the eyes, ears, and nose with icing.
Once the piggy has dried, draw on a mouth and add details with black gel icing.
Place your piggy in a nest of craft grass for an adorable, edible piggy in the grass.
haha what a cute looking creation! It is really pretty, even for a piggy 🙂
pinned
My kids love pigs! I think I may just have to make a piggy or two for their school lunches when they go back next week. Thanks so much for sharing!
This is so cute and looks easy to do!!
Well this is a cool idea if you have leftover items from Easter.
Now that is something the kids will surely enjoy making and eating.
Oh my goodness, how cute is this! My kids would love this!